Part 3 - SETUP 2 PAYMENT ACCOUNTS
Now that we have our initial budget, we need to pay for these expenses we expect to have. Most importantly we need to track them as well. I like to use 2 different payment accounts to manage and track how my spending progresses throughout the week and month. By using 2 different payment accounts I can focus one to easily track my required expenses and the other to track my discretionary spending. Let’s see how those break down.
First let’s tackle our required spending. I already know what I expect my required expenses to be about $3500.48 / month. I am going to round that to the next $100 to $3600. In this scenario, I get paid every 2 weeks, so I need to calculate how much I need to fund this payment account with via my paycheck. Getting paid every 2 weeks means I get paid 26 times per year while my monthly expense is only 12 times per year, so I will take $3600*12 = $43,200. Then I will divide by 26 and get $1661.54. I will take my paycheck and split it to be $1661.54 goes into my first payment account.
My second payment account is discretionary; therefore, I expect it to be higher or lower at times. Since the first part of my paycheck goes into my 1st payment account, I need to put the balance into my second payment account. $2446.93-$1661.54 = $785.39. That amount will have to last me what I can spend every 2 weeks.
While this may sound a bit complex, that is why we have tools to help us along the way. But the best part is that we have gotten over the most complex part of this plan. Now we have all our monthly required expenses covered and we only must concern ourselves with what we spend discretionary each week and we have a target for each week $785.39 / 2 = $392.70. If we can average less than that amount week over week, then we are meeting most of our basic financial goals.
Now that we have a plan, let’s see how we leverage our Excel Spreadsheet to build this for us and track this easily.
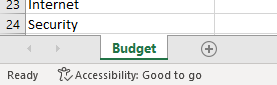
Step 1, Let’s rename the first worksheet to be our budget page.
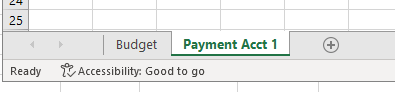
Step 2, Create a new tab called “Payment Acct 1”
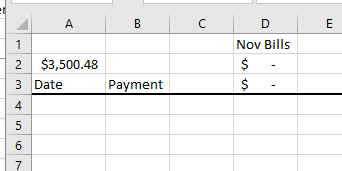
Step 3, we need to add a few things to our worksheet. Thankfully this already exists in the sample file you can download from the column on the right of the page. We add the Date and Payment column headers to A3 and B3. We also add “Nov Bills” to D3. Then we add a heavy line as a border under Row 3. In cell A2, we link it to our monthly expense total from our budget page and we multiply it by -1 (=Budget!G32*-1). By multiplying by -1, it just makes this page easier to fill out and maintain. We need to use a formula in D3 to sum everything below it. I used =SUM(D4:D100). Then in D2, we just use the same number as D3, so it is: =D3. Our worksheet looks like this now:
We will use this page to track our expenses as they come in through the month. To keep this simple we are going to put new expenses at the top and then everything will be in descending order.
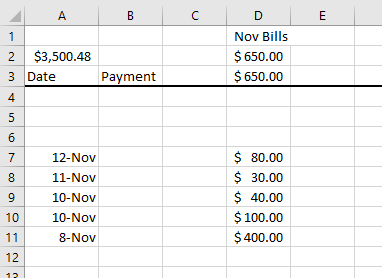
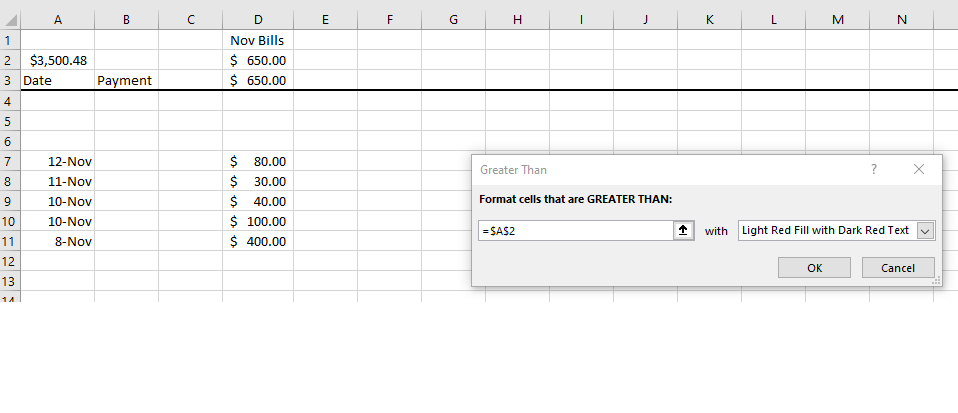
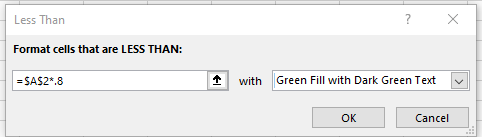
To make this useful we are going to use some highlighting using “Conditional Formatting.” I highlighted cells C2 through F2 and clicked on Conditional Formatting. I will be highlighting those cells in Red when the value is greater than A2. I will then be highlighting them in Green when less than A2*80%. And last highlighting in Yellow between A2*80% and A2.

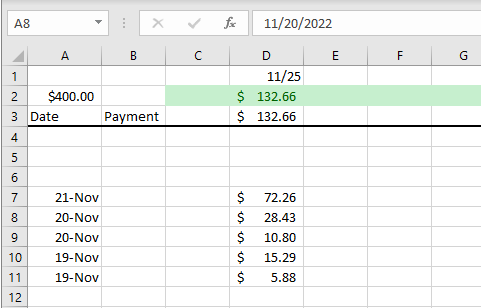
This page is now setup for use. To minimize effort for the next page, let’s just copy it. Once we copy it, we will change our column heading from “Nov Bills” to 11/25. My goal is to track discretionary expenses week over week. So, I picked Friday as the end of my week and the next Friday is 11/25. I also updated my total in A2 to match my target for the week.
That is plenty to cover for this week, but we are in a good position to use our new tool. We now can track our discretionary vs required expenses and our tool automatically highlights our expenses as they get close to our budget and then when they exceed our budget. This will help us make the minor adjustments we need to as we become more comfortable with tracking our expenditures.
Next week we will dive into the week by week tracking of our expenditures and start understanding what our new tool is telling us before we add more to the tool.
As always, please reach out in our forum if you have any questions on the process.
Thank you
Brian