Part 7 - Checking Account Tracking
It has been a couple weeks since I last posted during the holiday time. Hopefully you have been able to keep track of what we have already completed. So far, we have planned our budget, we are paying for our expenses via credit cards, but now we need to track our actual cash flow. Today we will add in our checking account tracking.
Tracking checking accounts is about managing cash flow. We will work on building the tool so you know how much you have in your checking accounts today along with planning for the next month.
We will first start by creating a new tab call “Checking.”

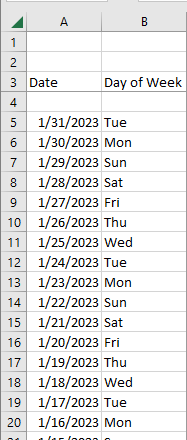
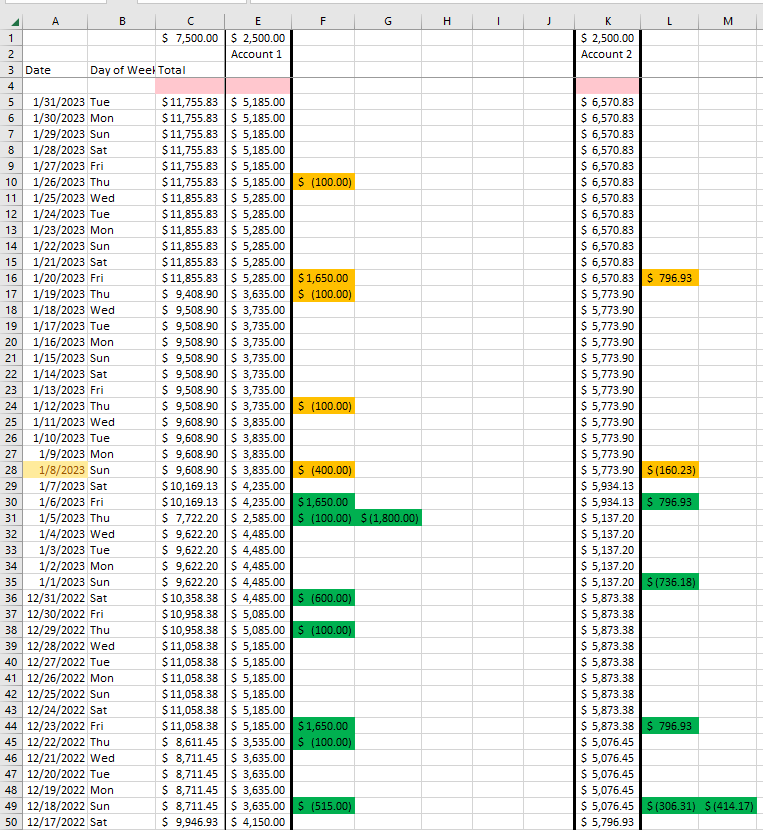
Like the other worksheets we will be arranging this vertically with the most recent dates at the top. I have created a Column for the Date and the Day of the week. One thing to notice is that I created the dates to the end of the month. I like to have at least the next 30 days on my plan, so it is close to time to expand through February as well.
Next, I will add a column for my total along with a column for Account 1 and Account 2. Since we are using 2 different checking accounts, we want to track money in both accounts, but also our total. I made sure to leave several columns of space between both account columns. This is important for what we do later:

Last part of the basic setup is that I will go to the earliest date I want to track and I will add 1 more row beneath it. This final row will be my starting balance in each column. Since this sample spreadsheet is made up, I made up that we are starting with $5,000 in each account.

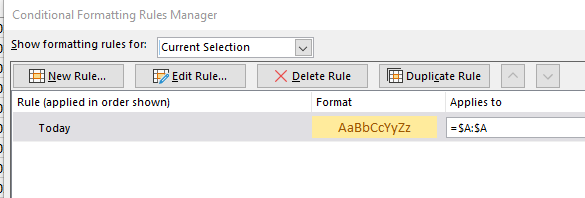
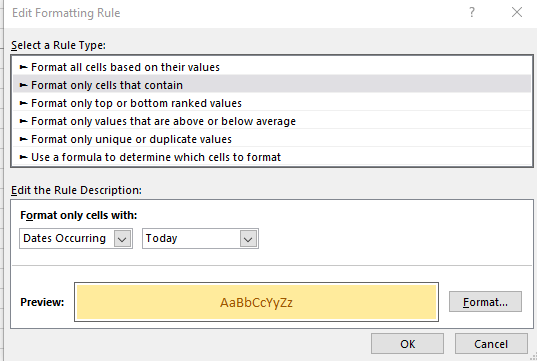
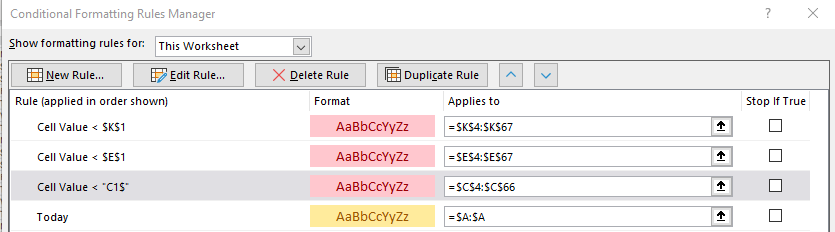
I will add some conditional formatting to column A. This will highlight today’s date in Yellow. As we use this tracking we will easily be able to find today’s date as we are updating our entries:
To automatically calculate the day of the week we use a simple formula looking at the date already in column A:
=TEXT(A66,"ddd")
Column C is to track our total amount in our accounts so let’s add another formula to sum Column E and Column K:
=SUM(E66,K66)
Column E is the total for Account 1. To maintain the running total we Sum the previous day with the new transactions for the current day. We plan to be putting the transactions in columns F through J. Make sure to use positive numbers for deposits and negative numbers for withdrawals.
=SUM(E67,F66:J66)
Column K is the same as Column for Account 2:
=SUM(K67,L66:P66)
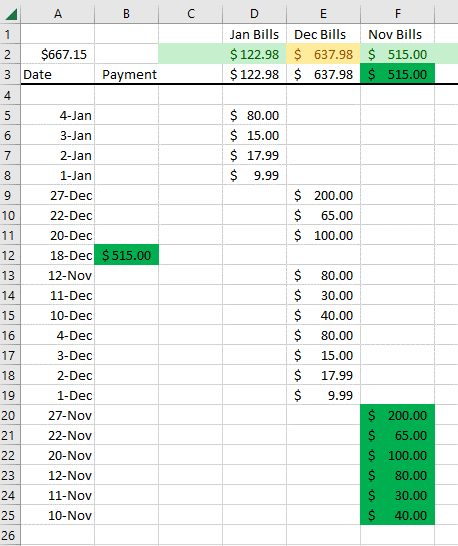
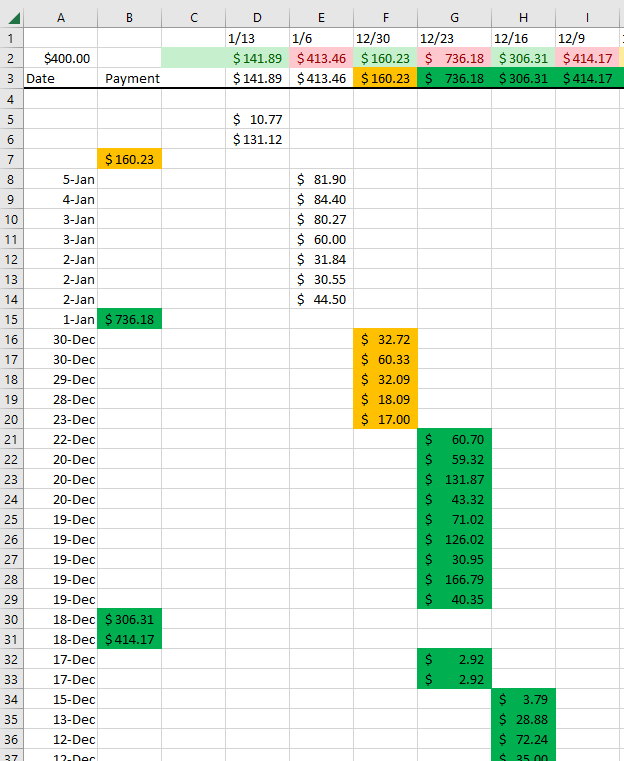
We are now ready to play a little catch up. To fill out our new worksheet we need to make sure all the previous work we have been building is current. I have added the monthly bills automatically charged to Credit Card 1. I have also added some spending during the holidays to Credit Card 2. Christmas is always a little more strenuous on the finances, but it doesn’t mean we should treat our budgeting any different.
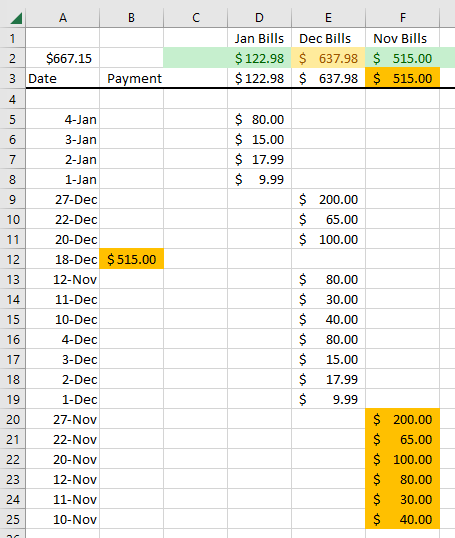
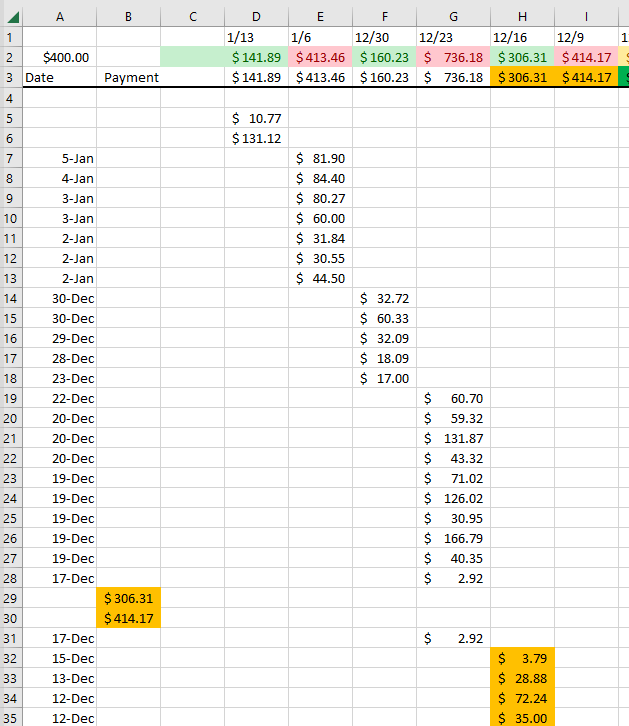
Last time when we left off we had submitted payments to pay off some of the transactions on those credit cards. They were highlighted in orange. It has been a couple weeks, but the right process is when you see those payment transactions clear out of your checking account then highlight them in green and that indicates to you, that those are done, closed, and you never have to worry about them any longer.
While I am at it, I am going to put in my additional payments that I submitted and some of which cleared since the last blog post.
Back to our checking account tracking. I will go ahead and add our credit card payments to our checking tracking. I have been using checking account 1 to pay credit card 1 and checking account 2 to pay credit card 2. Going back to our budget page we have a few transactions from our checking account 1 that are not paid by credit card, so I need to add those items onto the tracking as well.
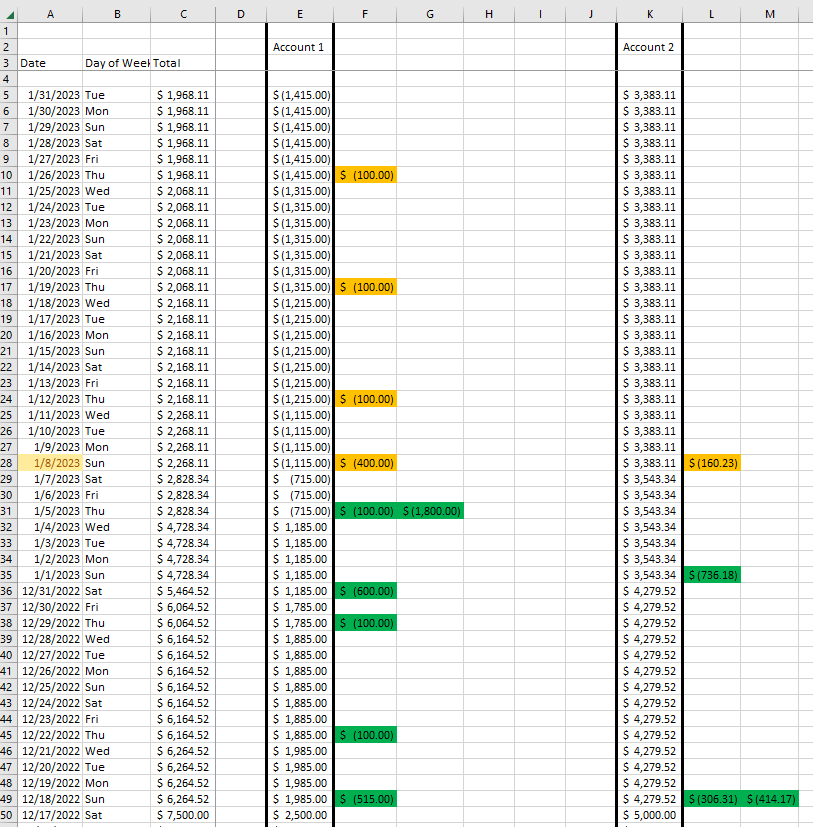
To provide a little more visibility we can add some more conditional formatting. I will put a minimum balance in Row 1, then for the total balance and each checking account balance I will highlight it red if the balance is less than my target minimum.
This has already been long, but we have 1 last step. One of the most fun parts. Let’s add our paycheck to the plan. If you have noticed there was a lot that went red in our last conditional format. But we haven’t been tracking our income to these accounts yet. Based on our budget we know we get paid $2446.93 every 2 weeks, but not all that needs to go to 1 checking account. Let’s put what we need to into our 1st checking account and then the rest of everything else into checking account 2.
Let’s take our $3500.48 of fixed expenses, multiply by 12, then divide by 26. That gives us $1615.61 to go to account 1. I’m going to round that up to $1650. We will then put the rest of the money into checking account number 2.
OK, after all that effort we are done for today. We now are tracking income and expense to our checking accounts. Those checking accounts are feeding our credit cards and we know our overall budget. We are getting close to our final working process. Just a few more elements to add and we will be able to spend 15 minutes a week to track our overall financial budget and provide ease of mind to ourselves and our families that depend on us.
Check back next week as we continue to track our expenses for the week and we look to add a new element, like paying down a loan or credit card.
Thank you
Brian